


Marklife Label Printer Home Assistant Integration
| P15 |
|---|
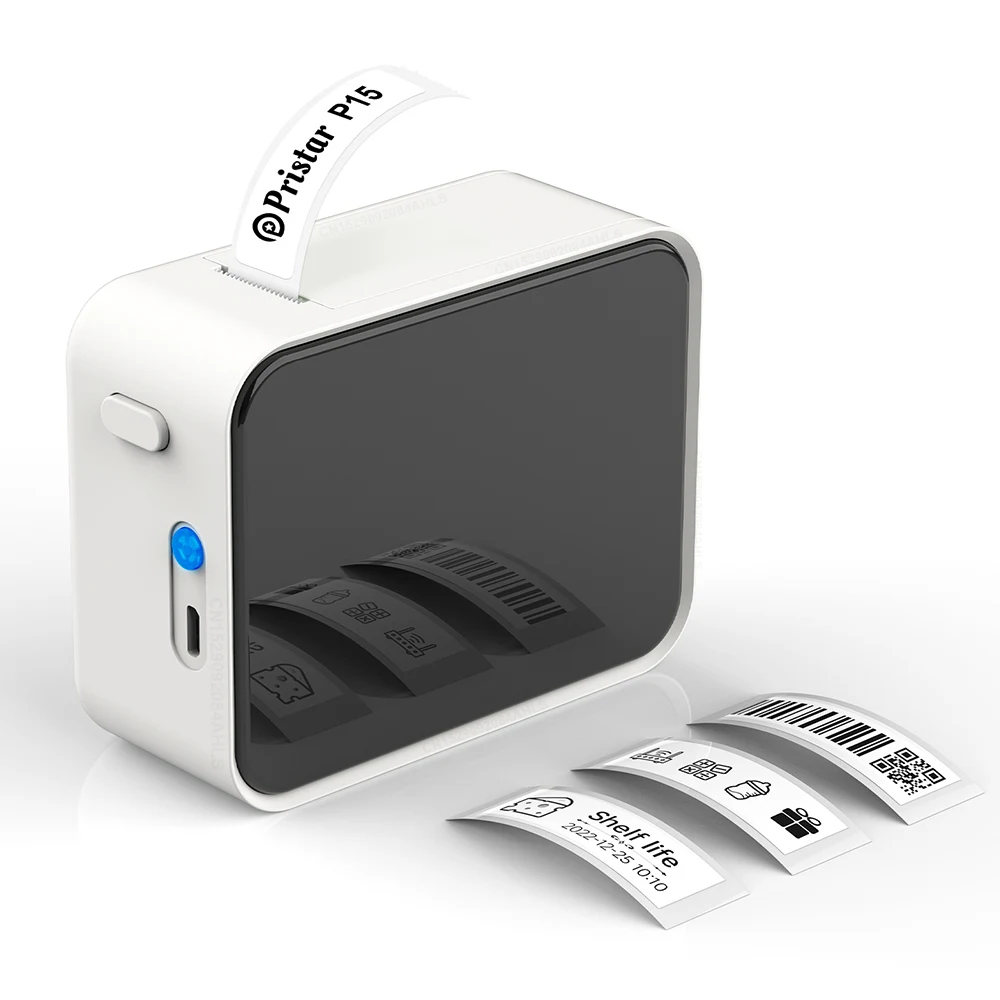 |
BLE protocol layer ported from tomLadder/thermoprint (MIT).
- Found a bug? Open an issue
- Questions or ideas? Join the discussion
Stash can print labels via this Home Assistant integration.
Two BLE protocol families cover every Marklife printer Home Assistant can reach. Status is confidence in the port, not evidence of it working.
| Model | Family | Print head | Status |
|---|---|---|---|
| P15, P15R, P15S | L11 | 384 px | ✅ P15 confirmed working |
| P7, P7R | L11 | 384 px | untested — protocol proven in thermoprint |
| P12, P11 | L11 | 384 px | untested — protocol proven in thermoprint |
| P1s, M1, S15, S12, LP15, LP90, LPC74, iSPACE_LP15, OUT_LPC | L11 | 384 px | untested — mapped to the P15/P12 profile by the vendor app |
| M60, X2 | Compressed | 384 px (unverified) | untested — protocol proven in thermoprint |
| P50, P50S, D50, ewtto ET- | Compressed | unverified | untested — profile inferred from APK notes |
| P80, T3 | Compressed | unverified | untested — no flow control, see below |
| Models | Why |
|---|---|
| S8, D210, 210, IP_D80, DP_D80, DP_8028, HM-24-28, A31, U210, A50, X8 | These use an older Bluetooth standard (Bluetooth Classic) which is not supported by Home Assistant's Bluetooth stack or ESPHome proxies. |
| D100, X4, L100, D200 | These use a closed, proprietary communication method that cannot be currently supported. |
If you try to add one of these printers, the integration will explicitly tell you it is unsupported rather than just silently ignoring it.
- Install with HACS (custom repository required), or copy this repo into
custom_components/marklife. - Restart Home Assistant.
- Go to Settings → Integrations and add Marklife.
- Select a discovered printer from the list.
Home Assistant selects candidates by advertised Bluetooth name; the integration then corroborates each one against the advertised service UUID where possible.
If nothing is discovered automatically, Add integration → Marklife does not dead-end. When no visible device matches a known name prefix, the flow falls through to a manual step that lists every Bluetooth device Home Assistant can currently see — and lets you type an address directly if the printer is not even in that list.
The manual step will ask you to select the printer model. Because some printers don't broadcast their exact model, the integration needs you to specify it so it knows how to correctly communicate with your device.
If you end up here, please report the exact advertised name so the matcher can be fixed for everyone.
It is strongly recommended to use a Bluetooth proxy instead of a built-in Bluetooth adapter for more stable connections and better range.
Tip
Hardware recommendations: Great ESP32 Board for an ESPHome Bluetooth Proxy
esp32_ble_tracker:
  scan_parameters:
    active: true

bluetooth_proxy:
  active: true
An ESP32 proxy supports three concurrent BLE connections. Each poll opens one, so keep the scan interval long and leave Keep BLE connection open off unless you print frequently.
Most settings have sensible defaults based on your printer model. If you experience printing issues, you can adjust advanced settings in Settings → Devices & Services → Marklife → Configure.
Asked during setup:
| Option | Default | Range | Description |
|---|---|---|---|
| Scan interval | 600 | 30–9999 s | How often to poll battery and status |
| Keep BLE connection open | Off | On/Off | Holds a connection between jobs — and a proxy connection slot |
Configure dialog only:
| Option | Default | Range | Description |
|---|---|---|---|
| Packet interval | 0 | 0–200 ms | Minimum gap between packets. 0 uses the device profile — 30 ms for most models, 1 ms for M60/X2 |
| Credit starvation timeout | 2000 | 500–10000 ms | How long to wait for a flow-control credit before forcing one |
| Max packet size | 180 | 20–237 B | Upper bound regardless of the negotiated MTU |
There is no sound setting: unlike Niimbot, whose 0x58 command toggles the
connection and power beeps, the Marklife command set has nothing for the buzzer
in either protocol family.
If prints come out with missing bands or stop partway, raise the starvation
timeout first in the configuration, then lower the max packet size. Leave the packet interval at
0 unless that fails too — at 0 it already follows the device profile, which
is the value the vendor app uses for that model.
Labels are rendered with imagespec — a declarative YAML/JSON list of drawing elements that becomes a bitmap sent to the printer.
| Topic | Link |
|---|---|
| Element examples with preview images | imagespec/docs/elements.md |
| All element fields & defaults | imagespec README — Element Reference |
| Layout, palette, LLM authoring guide | imagespec/docs/authoring.md |
| Dithering (per-element only) | imagespec/docs/dithering.md |
Marklife-specific behaviour:
- Palette: black & white only. Off-palette colors are quantized to the nearest supported color.
- Rotation:
rotate: 90/180/270rotates the drawing and swaps output width/height (label-printer mode). - Default width: omit
widthand the canvas matches the print head (384 dots on every profile so far). Anything wider is scaled down rather than truncated. - Orientation: Design your label exactly as you want to read it, and add
rotate: 90so the integration can automatically adjust the dimensions for the printer (see Label orientation). - Sizing in millimetres: all these printers are 203 dpi, i.e. 8 dots per mm. The 384-dot head is 48 mm wide.
- Default font:
ppb.ttfincustom_components/marklife/fonts/. Custom fonts also work fromwww/fonts/. plotelement: reads history from Home Assistant Recorder.- Dithering: not a service option. Put
ditheron photos and charts in the payload —dlimg,pie,diagram,plot,sparkline,progress_bar,gauge— when they use off-palette colors. Leave text/QR/barcodes withoutdither. See dithering.md. - Layout: prefer
row/column/stackover hand-calculated coordinates.
| Parameter | Required | Default | Description |
|---|---|---|---|
payload |
yes | — | List of imagespec elements |
width |
no | print head width | Canvas width in pixels |
height |
no | 240 |
Canvas height in pixels |
rotate |
no | 0 |
0, 90, 180, or 270 |
density |
no | profile default | Print darkness 1–3 |
paper_type |
no | gap |
gap advances to the next die-cut label; continuous feeds a fixed distance |
copies |
no | 1 |
Number of identical labels |
preview |
no | false |
Render only; do not send to the printer |
Use response_variable in scripts to receive the generated image as a data:
URL. The response also carries status, duration, width, height, and
copies.
Note
Density is 1–3, and the scale is per-family: the P15 sets darkness with a different command than the P12, and M60 remaps 1/2/3 onto 3/8/14 internally. Use 1–3 and let the device profile translate.
action: marklife.print
target:
  device_id: <your device>
data:
  payload:
    - type: text
      value: Hello World!
      font: ppb.ttf
      x: 10
      y: 10
      size: 40
    - type: qrcode
      data: "https://www.home-assistant.io"
      x: 270
      y: 10
      width: 80
      height: 80
  width: 384
height: 96Do not dither the whole label. Add dither on chart/media elements that use
off-palette colors (dlimg, pie, diagram, plot, sparkline,
progress_bar, gauge):
action: marklife.print
target:
  device_id: <your device>
data:
  payload:
    - type: text
      value: Product
      font: ppb.ttf
      x: 10
      y: 8
      size: 28
    - type: dlimg
      url: "https://example.com/photo.jpg"
      x: 10
      y: 40
      xsize: 120
      ysize: 90
      dither: floyd
    - type: pie
      x: 150
      y: 40
      radius: 40
      values: "A,40,orange;B,60,blue"
      dither: atkinson
    - type: diagram
      x: 250
      y: 40
      width: 120
      height: 90
      bars:
        values: "Mon,10;Tue,25;Wed,15;Thu,30"
        color: orange
      dither: bayer8
  width: 384
height: 200Design in reading orientation and rotate — rotate: 90 swaps the output axes, so
the 12 mm side ends up across the print head:
action: marklife.print
target:
  device_id: <your device>
data:
  payload:
    - type: text
      value: "Pantry"
      font: ppb.ttf
      x: 8
      y: 20
      size: 48
  width: 320      # 40 mm x 8 dots/mm — the long side, along the feed
  height: 96      # 12 mm x 8 dots/mm — the short side, across the head
  rotate: 90      # -> 96 x 320 raster
  paper_type: gap
density: 2The raster goes to the printer with its width across the print head and its height as the feed direction. On a die-cut roll the roll's width is the label's short side, so that short side is what spans the head — a 40 × 12 mm label is 12 mm across the head and 40 mm of feed.
If you set the canvas to match the printer exactly (width: 96, height: 320), you would have to design all your elements sideways.
Instead, the easiest and most practical way is to design the label exactly as you want to read it. Give the canvas its natural width and height, and simply add rotate: 90. The integration will automatically rotate your design and adjust the dimensions so it prints perfectly.
action: marklife.print
target:
  device_id: <your device>
data:
  payload:
    - type: text
      value: "{{ now().strftime('%Y-%m-%d %H:%M') }}"
      x: 8
      y: 8
      size: 32
  height: 64
paper_type: continuousUse preview: true while designing labels so nothing is sent to the
printer. Every print or preview updates image.<device>_last_label_made.
action: marklife.print
target:
  device_id: <your device>
data:
  preview: true
  payload:
    - type: text
      value: Preview Test
      x: 10
      y: 10
      size: 30
  width: 384
height: 96| Entity | Notes |
|---|---|
sensor.<device>_battery |
Percentage |
sensor.<device>_status |
out_of_paper, cover_open, overheating, low_battery, cover_closed |
sensor.<device>_print_duration |
Live during a job, final total after |
binary_sensor.<device>_out_of_paper / _cover_open / _overheating / _low_battery |
Derived from the status code |
binary_sensor.<device>_connection / _printing |
Connection and job state |
image.<device>_last_label_made |
Last label printed or previewed |
Marklife printers report one condition at a time, so exactly one fault sensor will be active at any given moment. Note that these printers do not support smart detection for label type or remaining paper.
Place .ttf files in custom_components/marklife/fonts/ or
config/www/fonts/ and reference by filename (e.g. ppb.ttf, rbm.ttf).
Enable debug logging first:
logger:
  default: warning
  logs:
    custom_components.marklife: debug
This logs every packet, credit grant, MTU announcement, and the built command sequence. Useful in a report:
- Printer model and the exact name it advertises over Bluetooth
- Local adapter or ESPHome proxy (and the ESPHome version)
- What the label actually did — nothing, partial, banded, garbled, correct
- The debug log around the print attempt
- imagespec — rendering engine
- tomLadder/thermoprint — protocol core and APK reverse-engineering notes