Hello! This README explains how to edit website content, add news items, and more. If you have questions please reach out to Billy Charlton. I'm happy to help! :-)
Instead of a full "content management system" (CMS), this site uses Hugo, a free and open source website system. It uses Git and GitHub to manage content.
That means that every change is recorded and we can always revert to a previous version -- so you don't need to worry about breaking things. If you break things we can just roll back to the previous edition of the site.
To make changes to the site, you'll need a GitHub user account.
Commiting any changes to the main branch on Github will trigger an auto-build of the site that will go live in about 2-3 minutes. (The action sets up and then runs the /convert-xlsx-to-json.py script.)
Easy things you might want to change:
- Front page news items entries are stored as markdown files in
/content/news/date-title.md - Big callouts on the front page are stored in
/data/callouts.yaml
Adding an entire new conference is a bigger task, generally you would want to copy the /content/2025 folder, modify the /data/conferences.yaml, and then modify as needed.
There are two ways to make changes to the MoMo website:
- Trusted Zephyr members can be added as maintainers of the site: please contact Billy or another admin to have your GitHub username added. Once you are added, you can modify the site directly.
- All other community members can make a fork of the site, modify as desired, and send a standard pull request. See the GitHub site documentation to learn about pull requests!
Use GitHub's built-in website content editor to add news items. All items are stored in the folder ./content/news.
Detailed instructions:
1. Be sure you are logged into GitHub as a user with write privileges.
If you do not have write access, fork the site and edit your own copy. You can create a pull request (PR) when you are done.
2. Create a new blank file for your news item.
- Navigate to the news folder here: ./content/news
- Click the
Add Filebutton in the upper right. Choose 'Create new file' - Enter the name of the file with this pattern:
2026-01-17-my-short-title.md
3. Paste this content into the file exactly as shown:
---
title: Your title here
date: 2025-10-05
---
Wow, we did it!
Add your content here. Any valid markdown is supported.
After pasting, modify the title: and date: lines to match the title and date you want shown on the news item.
4. Now add your content in markdown format below the three dashes.
You can look at the other news items for examples of how this should look. Any markdown is supported including bullets, links, and images. In the editor you can paste an image from your clipboard in with ctrl-v or you can upload a file into the ./assets/images folder. Either way works.
Remember, the front matter lines at the top of the file are important! Make sure to include at least
title: "My Flashy News Item Title"date: 2026-01-17(with your publish date, of course)
5. Click "commit changes" to save your work.
Your post will go live in about 2-3 minutes. Or if Hugo could not parse your file, editors will be an error email from Github and we can help you out!
That's how you add news items! If this is too complicated Billy is happy to take your news item content and add it for you. Really!
Session details are the one thing NOT stored in Github: they are all included in the Google Sheet export that came from the Whova site. The 2025 sheet is here - world readable on purpose:
Anyone with write access to that google sheet can modify session and speaker details. Editing requires a google account.
Presentation attachments: The last column in that spreadsheet is "Presentations" and has the full path to all presentations for a session. Each session is a row; the cell value is a comma-separated list of presentations if you have more than one. The presentations themselves are stored in the repo itself in folder ./static/presentations/2025/[Day]/...
After editing the session sheet, the site DOES NOT auto-rebuild. You must trigger the rebuild yourself. To rebuild the site with any changes, click on the Run workflow button here:
The MoMo website is built using Hugo and relies on the Hextra Starter Template.
- You can clone the repo or use the built-in web editor on GitHub itself if your changes are minor.
- If you want to develop locally, install hugo and run
hugo serveto see a local hot-reloading copy of the site. See the bottom of this readme for more setup instructions.
Notes below are from the original Hextra template README.
![]()

🐣 Minimal template for getting started with Hextra

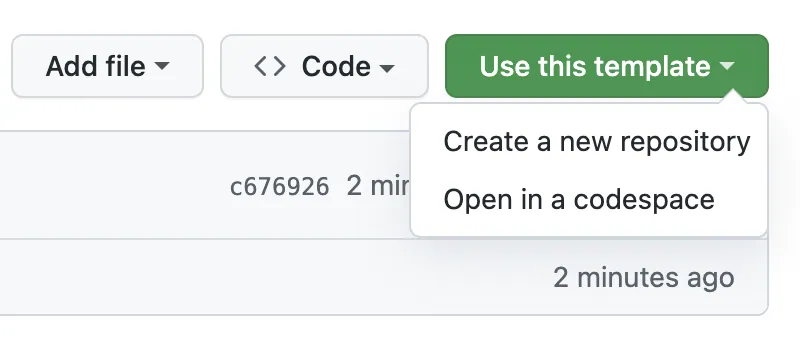
Use this template to create your own repository:
You can also quickly start developing using the following online development environment:
-

Create a new codespace and follow the Local Development to launch the preview
-

A GitHub Actions workflow is provided in .github/workflows/pages.yaml to publish to GitHub Pages for free.
For details, see Publishing with a custom GitHub Actions workflow.
Note: in the settings, make sure to set the Pages deployment source to GitHub Actions:

Run the workflow manually if it's not triggered automatically.

Override the configuration:

Pre-requisites: Hugo, Go and Git
# Clone the repo
git clone https://github.com/imfing/hextra-starter-template.git

# Change directory
cd hextra-starter-template

# Start the server
hugo mod tidy
hugo server --logLevel debug --disableFastRender -p 1313hugo mod get -u
hugo mod tidySee Update modules for more details.