Cosight is a Windows desktop client for real-time multimodal conversations. It connects a compatible realtime model to the user's microphone, shared screen, voice output, and agent-controlled screen drawing. The same client can switch between different Roles, allowing the model's identity, behavior, listening language, output language, voice, knowledge, and available abilities to change from one conversation to the next.
中文说明:README_zh.md
- Realtime conversation — talk with a realtime model through a WebSocket session powered by the Python bridge.
- Screen vision — share an entire display or a window so the model can understand what is currently visible.
- Listening and speaking — use a selected microphone as input and a selected Windows audio device for the model's voice output.
- Drawing on the real screen — when an entire display is shared and the Drawing ability is granted to the active Role, the model can draw markers, arrows, circles, rectangles, and other annotations on a transparent desktop overlay. The model receives the composed result so it can review its own drawing.
- Drawing and writing — Drawing is the unified Role-controlled visual ability for arrows, circles, rectangles, annotations, and short on-screen labels. Subtitles remains a separate Core setting that displays the model's spoken response as subtitles.
- Text input — typed messages use the same Listen input path as completed speech turns, so the rest of the conversation flow remains shared.
- Roles — create reusable prompt profiles with identity, goals, behavior, workflow, constraints, listening language, output language, voice, knowledge, abilities, and optional initiative rules.
- Multiple models — keep the original single-model realtime path, or turn on Harness mode from Models and configure independent Brain, Listen, Speak, and See models. Draw remains a local transparent-canvas executor.
- Context transfer — export transcript text and capability-call records, or import a previous transcript as conversation context. Media files are not embedded in these exports.
Click a thumbnail to watch the demo on YouTube.
Mock interviewer: listening and speaking
Mock interviewer: drawing
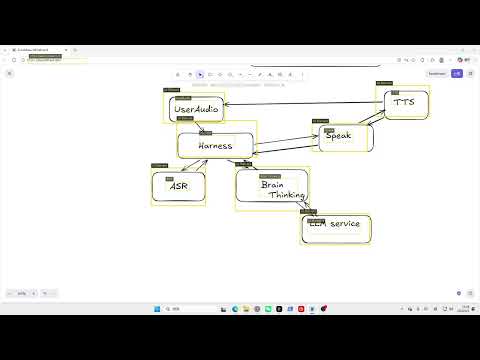
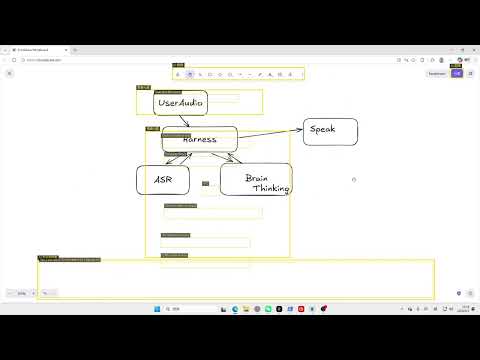
Mock interviewer: screen vision
Tabletop RPG session with a mock DM
The Windows installer is generated under release/ after packaging. After
installing Cosight, follow this flow to configure a model and start a chat.
The Chat Session page is the starting point. From here you can select a Role, share a display or window, and start a realtime chat.

Open Models, click Add model, and enter a user-defined alias, model name, realtime URL, and API Key. The alias helps distinguish multiple entries that use the same model. Select the saved model after adding it.

The API Key is intentionally empty in this documentation screenshot. Use your own compatible realtime endpoint and API Key; never commit real credentials to the repository.
Alibaba Cloud Bailian endpoint: For
qwen3.5-omni-flash-realtime, usewss://dashscope.aliyuncs.com/api-ws/v1/realtimewith a Mainland China API Key. If your API Key belongs to the Singapore or International site, usewss://dashscope-intl.aliyuncs.com/api-ws/v1/realtimeinstead. The API Key and WebSocket endpoint must belong to the same site or region.
Open Roles and choose Default or an official example Role. You can also
create a custom Role with its own identity, behavior, listening language,
output language, voice,
knowledge, and abilities.

Return to Chat Session, select the Role from the selector, and click Share screen. Select the display or window to share and wait until screen loading finishes. Then click Start chat and speak normally.

You can select the microphone, audio output device, and UI language in Settings. The Settings page groups device selection, connection and UI language, and behavior controls into separate sections. Confirm that the microphone level bar responds to your voice.

Stopping the chat ends the realtime model session; screen sharing is managed independently.
Drawing, Writing, and Core Subtitles require an entire display capture because their transparent overlay is positioned over the real desktop. Window capture is suitable for visual understanding, but it does not provide a reliable full-screen overlay coordinate system.
- Windows 10 or later
- Node.js and npm
- Python 3.12 or later (needed for the legacy single-model path and Windows packaging)
- Go 1.27 or later (needed for Harness mode and Windows packaging)
- A compatible realtime model endpoint and API Key
Install the JavaScript and Python dependencies:
npm ci
python -m pip install -r requirements.txt

# Optional for development when Harness is enabled:
npm run build:harness
Start the development client:
npm run devIf Python is not available as python, point the Electron bridge to another
interpreter:
$env:COSIGHT_PYTHON = "C:\Path\to\python.exe"
npm run dev
For a renderer-only production build:
npm run buildThe repository includes a one-command Windows packaging workflow. It creates a local packaging virtual environment, builds the standalone Go Harness, installs the bridge dependencies, builds the two Python entry points with PyInstaller, builds the Vite renderer, and creates an x64 NSIS installer with Electron Builder.
Run the normal build:
npm run package:winClean previous packaging output first:
npm run package:win -- -CleanIf the packaging Python interpreter is not on PATH:
$env:COSIGHT_BUILD_PYTHON = "C:\Path\to\python.exe"
npm run package:win
The installer is written to release/Cosight-Setup-<version>-x64.exe. The
installer uses a per-machine installation and requests administrator approval
so it can install under Program Files; the resulting application bundles the
Python runtime and bridge dependencies, so end users do not need to install
Python, Node.js, npm, pip, or the project dependencies separately.
For a public release, add a real application icon and configure a Windows code signing certificate in the Electron Builder configuration. The current workflow is intended for development and internal distribution.
electron/                 Electron main process, preload, and desktop overlay
src/                      React renderer and localized UI
python/                   Qwen Omni realtime bridge and prompt preview
harness/                  Go multi-model Harness and fixed JSON signal protocol
abilities/                Extensible abilities and their prompts/runtime code
  drawing/                Unified drawing and on-screen writing contract
  writing/                Backwards-compatible internal writing tool contract
  initiative/             Client-side initiative runtime
data/sample-roles.json    Official example Roles shipped with the application
packaging/                PyInstaller specifications
scripts/                  Packaging and sample-role maintenance scripts
New extensible abilities should be added under abilities/ in their own
directory. Foundational listening, speaking, and screen vision remain part of
the Core realtime path.
Cosight stores user-specific data under:
%APPDATA%\cosight
This includes model configuration, Roles, knowledge files, and logs. API Keys are stored through Electron's Windows-protected local storage mechanism. Do not commit user configuration, API Keys, logs, or local knowledge files to Git.
Bridge and Electron diagnostics are written under:
%APPDATA%\cosight\logs
Diagnostics record protocol events, tool results, errors, and payload lengths; raw audio and video frames are not recorded.
Structured log entries include INFO, ERROR, and DEBUG levels. Normal
runtime events use INFO; failures use ERROR. Harness latency aggregates for
Brain, See, and Speak, plus exact conversation content for later evaluation,
are written at DEBUG level and are not shown in the application UI.
When multi-model Harness mode is enabled, the application also writes
cosight-harness.log. It contains request IDs and stage timings for Listen,
See, Brain, Speak, and Draw, including See cache hits, frame-capture state,
timeouts, model response sizes, and action failures. Use listenEventId or
requestId to trace one turn across:
%APPDATA%\cosight\logs\electron.log
%APPDATA%\cosight\logs\cosight-harness.log
Logs do not store API Keys, full prompts, screenshots, raw audio, or raw video frames.
Official example Roles are maintained in data/sample-roles.json and are
included in packaged builds for first-run discovery. To synchronize the sample
Role data during development:
npm run sync:sample-rolesSample Roles must not contain API Keys, user knowledge files, or machine-specific absolute paths.