This is the repository I use to render my YouTube videos.
SwapTube is built on FFMPEG, but most of the functionalities above the layer of video and audio encoding are custom-written. The project does not use any fancy graphics libraries, with a few exceptions for particular functionalities.
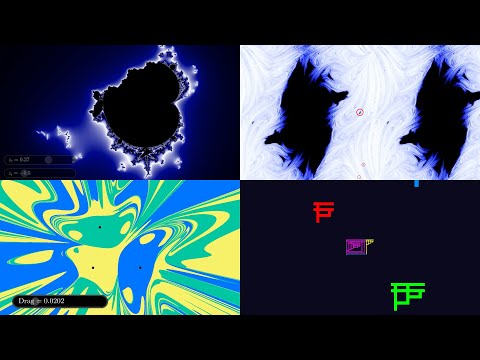
SwapTube is developed, and is known to compile and run on several Linux distributions. MacOS and Windows are untested. Furthermore, a CUDA-compatible NVIDIA GPU or a HIP-compatible AMD GPU is required.
Note that the HIP folder is generated on HIP-compatible machines by translating the CUDA folder with hipify. Do not modify any of the contents in HIP/, instead treat the CUDA folder as the source of truth and modify that. It will be re-translated via CMake.
There is an experimental Windows/MSVC build available in a fork: meghanto/swaptube. It is not officially supported here, may lag behind master, and comes with no guarantee of ongoing maintenance.
The following external dependencies are required for specific functionalities within the project. These dependencies must be installed if you want to use the related features.
| Item | What functionality is it needed for? | Used Where? | Used How? | Sample Ubuntu Installation |
|---|---|---|---|---|
| CMake and Ninja | Everything | go.sh script | Compiles the project | sudo apt install cmake ninja-build |
| FFMPEG 5.0 or higher, and associated development libraries | Everything | audio_video folder | Encoding and processing video and audio streams | sudo apt install ffmpeg libswscale-dev libavcodec-dev libavformat-dev libavdevice-dev libavutil-dev libavfilter-dev Note: compiling ffmpeg from source, it will likely be compiled with support for extra features detected on your system, which are not baked into my CMake config. I suggest installing a precompiled binary. |
| CUDA or HIP/ROCm | Computationally intensive graphics | Video render loop | Various | Hardware-dependent |
| gnuplot | Debug plot generation | DebugPlot.h | Data dumped in out/ is rendered to a PNG | sudo apt install gnuplot |
| MicroTeX | In-Video LaTeX, LatexScene | visual_media.cpp | Converts LaTeX equations into SVG files for rendering | Instructions are here: https://github.com/NanoMichael/MicroTeX/ You should install MicroTeX in MicroTeX-master alongside the swaptube checkout. Instructions will be printed if not found. |
| RSVG and GLib | In-Video LaTeX | visual_media.cpp | Loads and renders SVG files into pixel data | sudo apt install librsvg2-dev libglib2.0-dev |
| Cairo | In-Video LaTeX | visual_media.cpp | Renders SVG files onto Cairo surfaces and converts them to pixel data | sudo apt install libcairo2-dev |
| LibPNG | PNG scenes | visual_media.cpp | Reads PNG files and converts them to pixel data | sudo apt install libpng-dev |
For easy deployment with all dependencies included, see the docker/README.md for containerized setup instructions. This is optional and community-made for Docker users. I (2swap) personally don't use or maintain it.
Windows users run swaptube inside WSL2, GPU included.
-
Install WSL2 and Ubuntu from an elevated PowerShell, then reboot:
wsl --install -d Ubuntu
-
Install the dependencies from the Ubuntu shell:
sudo apt update && sudo apt install -y \
    cmake ninja-build gnuplot ffmpeg pkg-config g++ \
    libswscale-dev libavcodec-dev libavformat-dev libavdevice-dev \
    libavutil-dev libavfilter-dev libswresample-dev \
    librsvg2-dev libglib2.0-dev libcairo2-dev libpng-dev libgdk-pixbuf-2.0-dev \
    nvidia-cuda-toolkit mpv
Install only the CUDA toolkit. WSL gets the GPU from the Windows NVIDIA driver by way of
/usr/lib/wsl/lib; installing a Linux driver package inside the distro breaks that. Confirm withnvidia-smi. -
Clone into the Linux filesystem, not
/mnt/c. Small-file I/O across the Windows boundary is roughly 75x slower, and a render writes one PNG per frame.git clone https://github.com/2swap/swaptube.git ~/swaptube cd ~/swaptube
-
Build MicroTeX. The first
./go.shoffers to clone and build it into../MicroTeX-masterfor you. Accept, and follow the hint it prints if a package is missing. -
Run it.
./go.sh MandelbrotDemo 1920 1080 30
Two things behave differently than on a native Linux. WSL2 defaults to half your RAM, so a large render may need a C:\Users\<you>\.wslconfig containing [wsl2] and a higher memory allocation. Additionally, CUDA kernel launches cross a paravirtualization boundary, which costs a fixed couple of milliseconds per frame.
When you have created a project file src/Projects/yourprojectname.cpp, you can compile and run the whole project by executing:
./go.sh yourprojectname 640 360 30Some example code and demos can be found in src/Projects/Demos/. How to run a demo (code run from project root):
./go.sh LambdaDemo 640 360 30This indicates a 640x360 landscape resolution at 30FPS. Swaptube defaults to an audio sample rate of 48000 Hz- If you need to change that for whatever reason, they are specified in go.sh and record_audios.py.
You can validate your local installation with ./test.sh, which will compile and smoketest every "Demo" project in src/Projects/Demos/ without encoding a video.
-
src/: Source folder structure is documented in the readme inside of it.
-
out/: Contains the output files (videos, corresponding subtitle files, data tables, and gnuplots) generated by swaptube.
- Each subfolder corresponds to a project, and under that project, each render is stored in a separate folder named by timestamp.
microblock_counts.txt: Written by the smoketest and read by the render, holding the number of microblocks observed in each macroblock.
- Each subfolder corresponds to a project, and under that project, each render is stored in a separate folder named by timestamp.
-
media/: Stores input media files used by the project. This includes script recordings, generated LaTeX, source MP4s, and source PNGs.
- You should not ever need to manually modify anything here, with the exception of placing source PNGs and MP4s. Audio should be recorded using
record_audios.pyafter rendering your project. Some_Project/: Put media for your project here.record_list.tsv: This will be generated by the program after rendering your project, and is read by therecord_audios.pyscript so that you can record your script easily in bulk.
- You should not ever need to manually modify anything here, with the exception of placing source PNGs and MP4s. Audio should be recorded using
-
build/: Contains, most importantly, the compiled binary. Caches and miscellaneous data products may also be dumped here, for example discovered connect 4 steady states and graphs, as well as CMake caches and the like. You should not need to ever enter this folder. Use the
go.shscript to start builds. -
record_audios.py: Reads the record_list.tsv file and permits you to quickly record all of the audio files for your video script.
-
go.sh: The program entry point! It compiles, smoketests, and runs your project file at a specified resolution and framerate.
-
play.sh: Plays back the most recently rendered video with the provided project name.
-
test.sh: Compiles and smoketests all demo projects.
Swaptube uses a 2-layer time organization system. At the highest level, the video is divided into Macroblocks, which can be thought of as atomic units of audio. In practice, a Macroblock usually corresponds to a single sentence in the video script. Macroblocks are divided into Microblocks, which represent atomic time units controlling visual transformations. Often a Macroblock only has one Microblock, but more complex Macroblocks may have multiple Microblocks to allow for visual transitions or animations to occur over the duration of the Macroblock. Such division permits the user to define a video with an in-line script, such that SwapTube will do all time management and the user does not need to manually time each segment of video. Furthermore, this permits native transitions: since a transition occurs over either a Macroblock or Microblock, Swaptube knows the duration of time over which the transition occurs, and can manage that transition automatically through State.
There are a few types of macroblocks: FileBlocks, SilenceBlocks, GeneratedBlocks, etc. A FileBlock takes subtitle text. SwapTube derives a .wav filename from that text and writes both the filename and text to record_list.tsv.
SilenceBlocks are defined by a duration in seconds, and GeneratedBlocks are defined by a buffered array of audio samples generated in the project file.
A macroblock is staged globally, and a scene renders its visual segments:
stage_macroblock(FileBlock("This is narration."));
yourscene.render_microblock();After a Macroblock has been staged, the project file renders each microblock by calling yourscene.render_microblock();. SwapTube counts these calls during smoketesting, so the number of microblocks does not need to be supplied in advance.
The overload stage_macroblock(block, n) overrides the count for the full render. SwapTube warns when n differs from the number of calls the smoketest observed, and the render uses n. Use it when the render should deliberately differ from the smoketest.
In order to ensure that your time control is defined correctly and that the project does not crash before potentially kicking off a multi-hour render, SwapTube has a smoketest feature. Every go.sh run performs a mandatory smoketest. Unless -s is used, the full render begins after it passes.
A smoketest runs the project at 320x180. It counts every call to render_microblock() and draws one test frame per microblock. Unless -s is used, SwapTube then runs the project a second time at the requested dimensions and uses the recorded counts for the full render.
Project control flow must be repeatable: the smoketest and full render must stage the same macroblocks and call render_microblock() the same number of times. Do not base those calls on frame output or data that changes only when frames are rendered. SwapTube stops if the full render does not match the recorded counts, unless the macroblock supplies its own count.
During smoketesting, SwapTube recognizes the end of a macroblock when the next macroblock is staged or the project ends. Code between a macroblock's final render_microblock() call and the next stage_macroblock() call must not depend on its end-transition hook having run.
Things that happen during smoketesting:
- One frame per microblock is staged and rendered
- State transitions are performed as normal to test validity of state equation definitions
- The record_list.tsv file is re-populated, so you can record your audio script after smoketesting without performing a full render.
Things that do NOT happen during smoketesting:
- No video or audio is encoded.
- No subtitle entries are written.
You can run ./go.sh MyProjectName 640 360 30 -s, using the -s flag to indicate "smoketest only". This skips the full render after the smoketest.
While working on a later section, set_for_real(false) keeps running project logic but skips drawing and encoding. Call set_for_real(true) before the section that you want to render normally:
set_for_real(false);
// Stage and run sections that do not need to be encoded.
set_for_real(true);
// Subsequent sections render normally.
This is a development shortcut for reaching a later section without rendering the beginning again; it does not skip project execution.
State: The "State Manager" tracks a list of definitions of variables, arranged in a dependency graph of definitions, eventually decided from upstate "global state" sensors, such as the current microblock completion fraction {microblock_fraction} or the number of seconds elapsed in the video {t}. It is best used for any numerical or boolean information used by the Scene to render a particular frame: opacities, angles, camera positions, real-valued parameters, etc. All scenes have a StateManager, and when the user whishes to modify the scene's state, they can do so by calling functions on the StateManager. Usually these will be set and transition function calls. Since State uniquely contains numerical information, swaptube will handle all the clean transitions of state.